[vc_row][vc_column][eltdf_button type=”simple” text=”Back to Making Art” target=”_self” icon_pack=”font_elegant” fe_icon=”arrow_carrot-2left” font_weight=”” text_transform=”” link=”https://learnmycraft.com/in-the-studio/”][vc_column_text css_animation=”none”]
How to photograph your art on a budget
Art Is My Career | 30th August 2021[/vc_column_text][vc_empty_space height=”20″][vc_separator align=”align_left” border_width=”5″][vc_empty_space height=”20″][vc_column_text css_animation=”none”]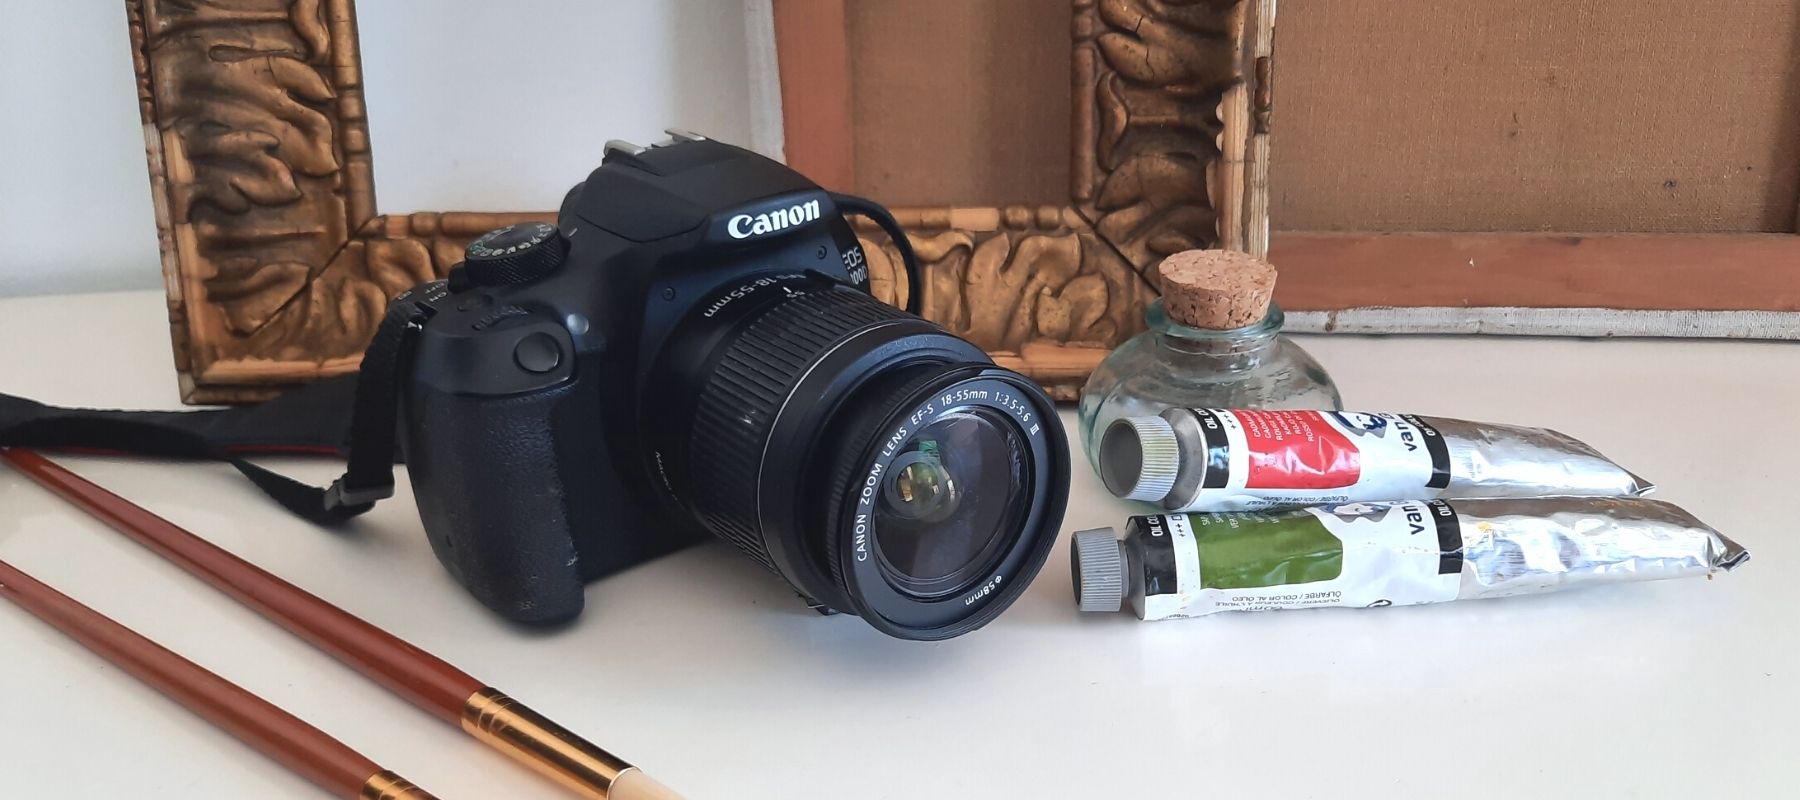
If you’ve spent hours of time creating the perfect artwork, you want to be able to share that work with the world by sharing photographs of your work. You might be looking to share photographs of your work on social media, on your website, or by submitting the work to competitions, galleries, and societies.
This article will explain how to properly photograph your art on a budget, using affordable (and sometimes homemade) equipment. You can create professional-quality images and videos of your artwork at home for a fraction of the cost of professional artwork photography services.
Achieving high-quality photographs is as much about preparation as it is about skill or equipment. By creating a reliable setup that you can use again and again, your photos will remain bright, clear, and consistent.
1. Basic Photography Terminology
2. Camera settings for photographing art
3. Equipment for artwork photography
4. The importance of good lighting
5. How do you photograph artwork without glare?
6. The biggest mistakes when photographing art
7. Using a smartphone to photograph your art
8. Should you use a scanner or a camera to make prints?
9. Editing your photos – what to do and what to avoid
Basic Photography Terminology
Let’s start with the three most important photography terms, Aperture, ISO and Shutter Speed:
Aperture
Aperture describes how open the camera lens is, and therefore how much light it lets through. This not only dictates how bright your photograph comes out, but also the depth of field.
Aperture is measured in f-stops, most commonly from f/1 (wide open) to f/22 (very narrow). The lense on your camera will dictate the range of apertures you are able to use.
To put it simply:
Low f-stop = more light into the camera and a shallower focus (blurry background, focused foreground)
High f-stop = less light into the camera and a deeper focus (sharper background and foreground)
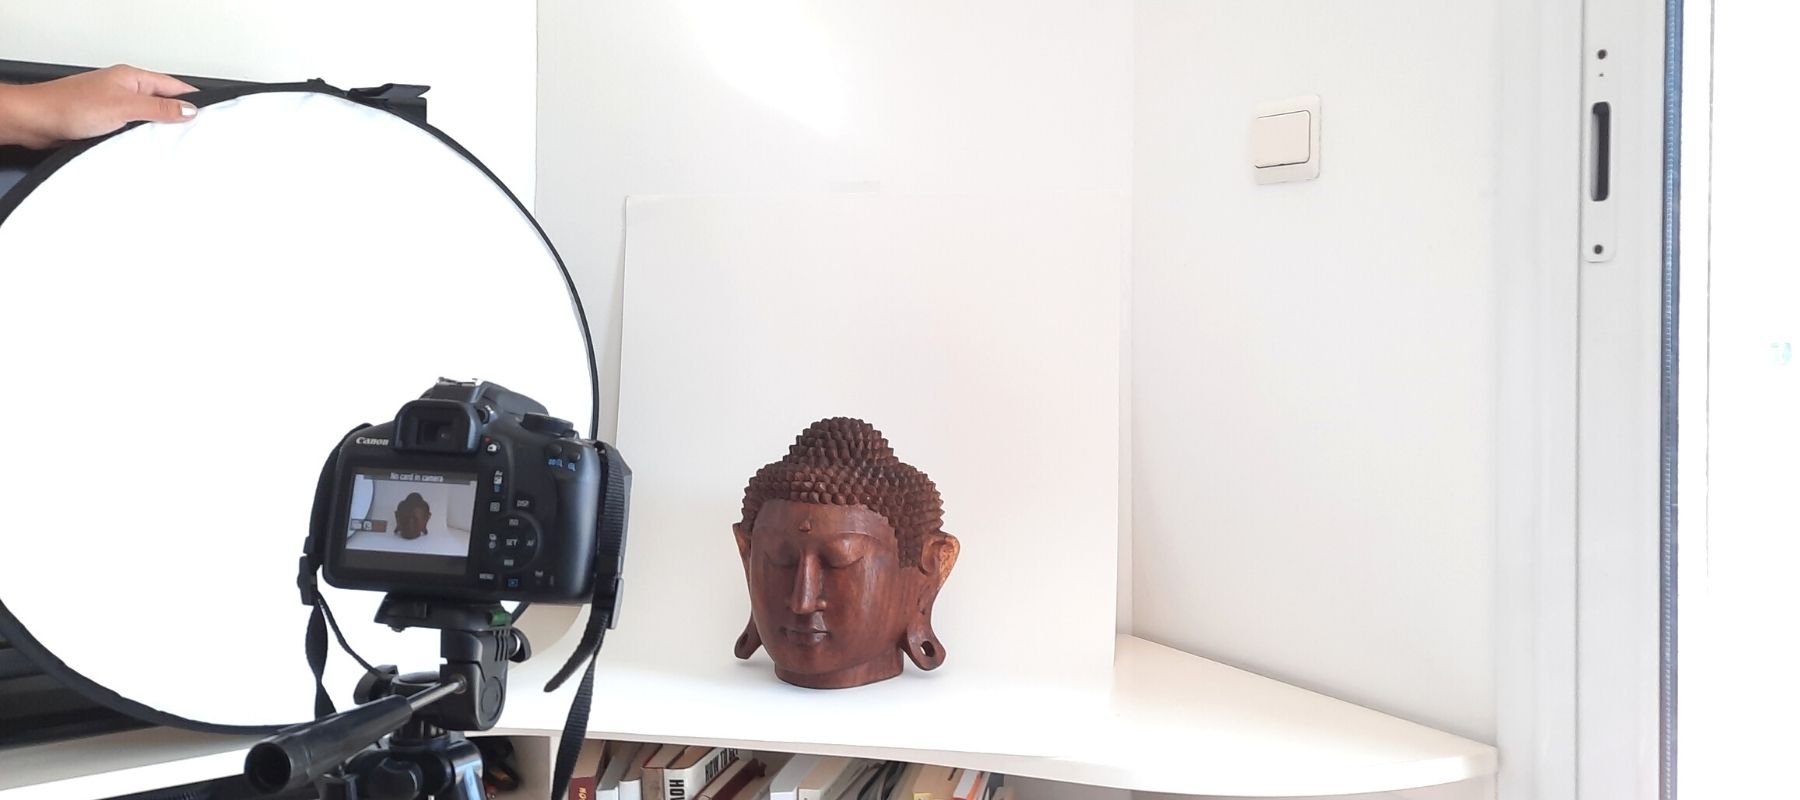
Depth of field example pictures of buddah head at f/4 for blurry background and f/32 for all clear.
Playing with depth of field can create an excellent effect if you are photographing sculpture, ceramics or complex textured detail.
ISO
ISO is a camera setting that will affect how bright or dark your photo is. As the ISO number increases, your photo will become brighter. However, if you increase it too far the picture will become grainy.
ISO (International Organization for Standardization) is a term first used for film cameras, referring to film sensitivity, but it is now used also in digital cameras referring to the light sensors.
Most of the time you won’t need to adjust your ISO past the base; usually ISO 100 or whatever the lowest level is) as this offers the highest quality image. However, it can be helpful when you have reached the limits of what you can adjust using aperture and shutter speed.
Every camera is different, but most will run from ISO 100 (Low ISO) to ISO 6400 (High ISO). Most modern digital cameras will have automatic settings for ISO.
Images showing low ISO sharp image and very high ISO showing grain but taken in low light conditions.
Shutter Speed
Shutter speed determines how long the sensor is exposed to light, and is typically measured in fractions of a second. For example, 1/60 means one sixtieth of a second..
If you are capturing images of a fast-moving subject, you will need a very fast shutter speed to avoid blurring. If you are photographing traffic or moving water, a slower shutter speed can create a nice, soft effect.
The slower the shutter speed you chose, the more light is let into the camera, leading to a brighter picture.
A shutter speed of around 1/200 is ideal, but typical shutter speeds range from 1/500 to 1/60.
Automatic Mode
For general applications and day to day use, most cameras offer an automatic mode. This is useful if you are taking a lot of pictures, e.g. for social media, or are taking pictures in a controlled environment like a studio. This is a great place to start, however, some users might find automatic mode too limiting.
Some cameras also have ‘semi automatic’ modes, that give you some control over certain settings with the majority decided by the camera.
Try the Canon EOS Rebel T7 for a good entry-level digital SLR camera that is suitable for photographing artwork.
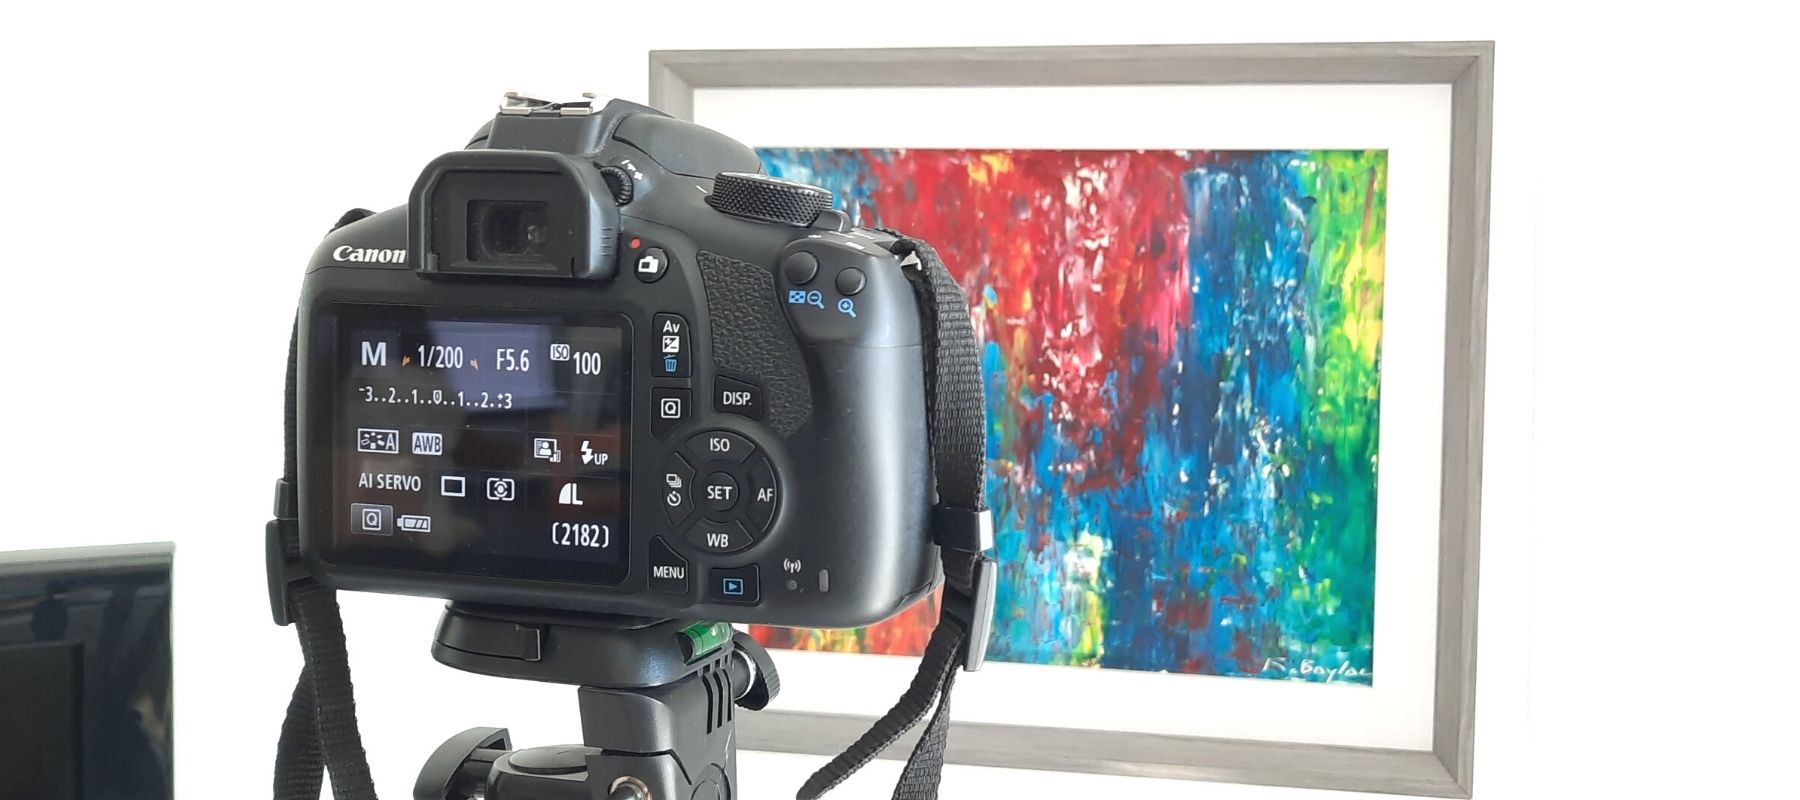
Camera settings for photographing art
If you aren’t using automatic mode, it’s important to have your camera on the right setting to ensure crisp, accurate images.
Because we are working inside, in a controlled environment, these settings are quite straightforward.
- Aperture – To photograph art on a digital slr camera, look for an aperture setting of between f-8 to f-11.
- ISO – An ISO of ISO 100 is a good base that is suitable for photographing artwork in a studio setting.
- Timer – Set your timer to 3-5 seconds for each shot, this avoids shaking the camera as you press the shutter.
Equipment for artwork photography
If you are keen to invest in some photography equipment for your studio, there are certain pieces of equipment that will make a big difference, and they won’t break the bank. Photography equipment has become much more affordable in recent years, from entry level DSLR cameras to lighting rigs and tripods.
Cameras
These are some good entry level cameras suitable for photographing artwork and to use in the studio.[/vc_column_text][/vc_column][/vc_row][vc_row][vc_column width=”1/2″][vc_column_text]
Canon EOS Rebel T7 DSLR Camera with 18-55mm Lens – $449.00
[eltdf_button size=”” type=”” text=”Buy on Amazon” custom_class=”” icon_pack=”font_awesome” fa_icon=”” link=”https://www.amazon.com/gp/product/B07C2Z21X5/ref=as_li_tl?ie=UTF8&camp=1789&creative=9325&creativeASIN=B07C2Z21X5&linkCode=as2&tag=semamartinpet-20&linkId=74ad0ea5a0c09eed9d731f750085f9b6″ target=”_self” color=”” hover_color=”” background_color=”” hover_background_color=”#42495B” border_color=”” hover_border_color=”” font_size=”” font_weight=”” margin=””]
[/vc_column_text][/vc_column][vc_column width=”1/2″][vc_column_text]

Panasonic LUMIX G85 4K Digital Camera – $697.99
[eltdf_button size=”” type=”” text=”Buy on Amazon” custom_class=”” icon_pack=”font_awesome” fa_icon=”” link=”https://www.amazon.com/gp/product/B01M050N05/ref=as_li_tl?ie=UTF8&camp=1789&creative=9325&creativeASIN=B01M050N05&linkCode=as2&tag=semamartinpet-20&linkId=16a4888097f8f366f5dd0201d7305ad1″ target=”_self” color=”” hover_color=”” background_color=”” hover_background_color=”#42495B” border_color=”” hover_border_color=”” font_size=”” font_weight=”” margin=””]
[/vc_column_text][/vc_column][vc_column][vc_column_text]
Lighting
There are a range of lighting options available these days. As a minimum, look for a pair of continuous lights with diffusers for a soft, even light.[/vc_column_text][/vc_column][/vc_row][vc_row][vc_column width=”1/2″][vc_column_text]
MOUNTDOG Softbox Lighting Kit – $68.99
[eltdf_button size=”” type=”” text=”Buy on Amazon” custom_class=”” icon_pack=”font_awesome” fa_icon=”” link=”https://www.amazon.com/gp/product/B07G32T189/ref=as_li_tl?ie=UTF8&camp=1789&creative=9325&creativeASIN=B07G32T189&linkCode=as2&tag=semamartinpet-20&linkId=d12e4885e8c760f96af100b85be189f4″ target=”_self” color=”” hover_color=”” background_color=”” hover_background_color=”#42495B” border_color=”” hover_border_color=”” font_size=”” font_weight=”” margin=””]
[/vc_column_text][/vc_column][vc_column width=”1/2″][vc_column_text]

Fovitec 3-Light Fluorescent Studio Lighting Kit – $189.95
[eltdf_button size=”” type=”” text=”Buy on Amazon” custom_class=”” icon_pack=”font_awesome” fa_icon=”” link=”https://www.amazon.com/gp/product/B00KRN0SEI/ref=as_li_tl?ie=UTF8&camp=1789&creative=9325&creativeASIN=B00KRN0SEI&linkCode=as2&tag=semamartinpet-20&linkId=0ba0797a5133222b04082273635803ad” target=”_self” color=”” hover_color=”” background_color=”” hover_background_color=”#42495B” border_color=”” hover_border_color=”” font_size=”” font_weight=”” margin=””]
[/vc_column_text][/vc_column][vc_column][vc_column_text]
Tripods
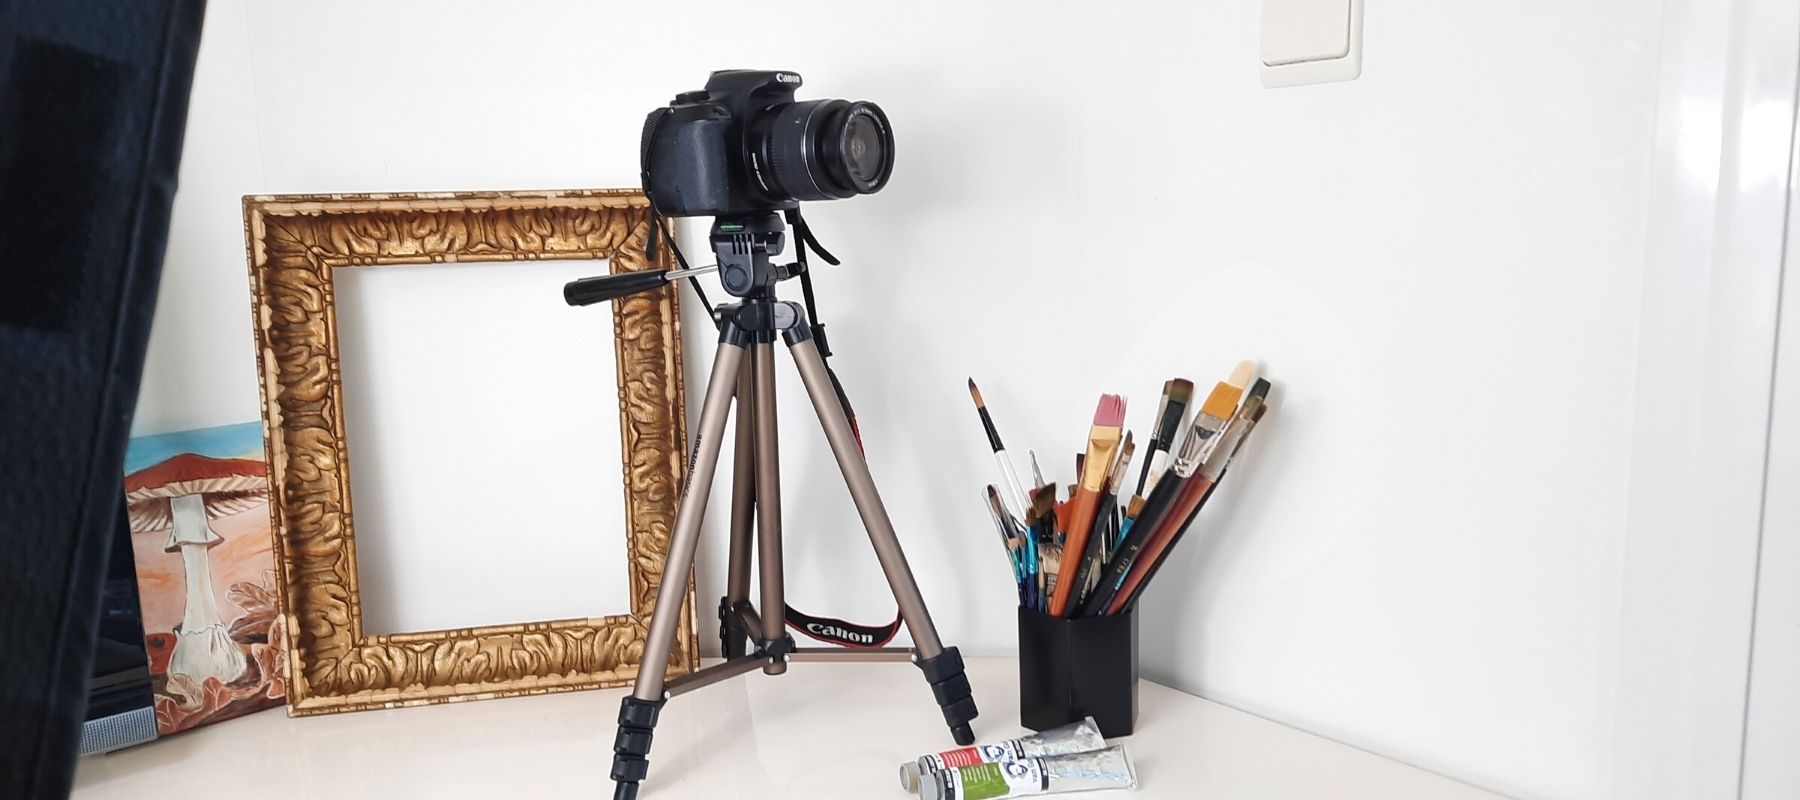
Whether you are using a digital SLR camera or simply a phone, you are going to benefit from attaching it to a tripod. Most cameras will have a universal fixing on the base that works with most tripods, if you are using a phone camera you may need to buy another mount to attach it.[/vc_column_text][/vc_column][/vc_row][vc_row][vc_column width=”1/2″][vc_column_text]
Amazon Basics Lightweight Camera Mount Tripod Stand With Bag – $17.49
[eltdf_button size=”” type=”” text=”Buy on Amazon” custom_class=”” icon_pack=”font_awesome” fa_icon=”” link=”https://www.amazon.com/gp/product/B00XI87KV8/ref=as_li_tl?ie=UTF8&camp=1789&creative=9325&creativeASIN=B00XI87KV8&linkCode=as2&tag=semamartinpet-20&linkId=1f80fbc1b0be1e9aa6a31daa0da675b8″ target=”_self” color=”” hover_color=”” background_color=”” hover_background_color=”#42495B” border_color=”” hover_border_color=”” font_size=”” font_weight=”” margin=””]
[/vc_column_text][/vc_column][vc_column width=”1/2″][vc_column_text]

UBeesize 67” Camera Tripod with Travel Bag – $37.99
[eltdf_button size=”” type=”” text=”Buy on Amazon” custom_class=”” icon_pack=”font_awesome” fa_icon=”” link=”https://www.amazon.com/gp/product/B08CHFY4R5/ref=as_li_tl?ie=UTF8&camp=1789&creative=9325&creativeASIN=B08CHFY4R5&linkCode=as2&tag=semamartinpet-20&linkId=6f4f0ad981b8fad650aff92d3ee56b0c” target=”_self” color=”” hover_color=”” background_color=”” hover_background_color=”#42495B” border_color=”” hover_border_color=”” font_size=”” font_weight=”” margin=””]
[/vc_column_text][/vc_column][vc_column][vc_column_text]
Photographing paintings and drawings
Whether you are photographing paintings, drawings, pastel or even sculpture and handmade items, the same principles apply. Your photos should be clear, well lit and accurate to life. This will show your artwork at its best.
The importance of good lighting
Good lighting is the key to good artwork photographs. The most common mistake artists make is to start taking photographs of their paintings without considering lighting first.
So what counts as good? If you want a clear, accurate photograph of your work, you need an even, white light that is evenly diffused.
There are a few ways you can achieve this.
Natural light
Photographing your art using natural lights is ideal, as it accurately reflects how your work looks in real life, without the enhancement of artificial lighting. Using natural light is also free, making it ideal for budget-conscious artists.
As a minimum you will need a camera (a phone is fine), a tripod (to prevent your pictures coming out blurry) and something to reflect light with, either a photography reflector or a simple piece of white card or foam board.
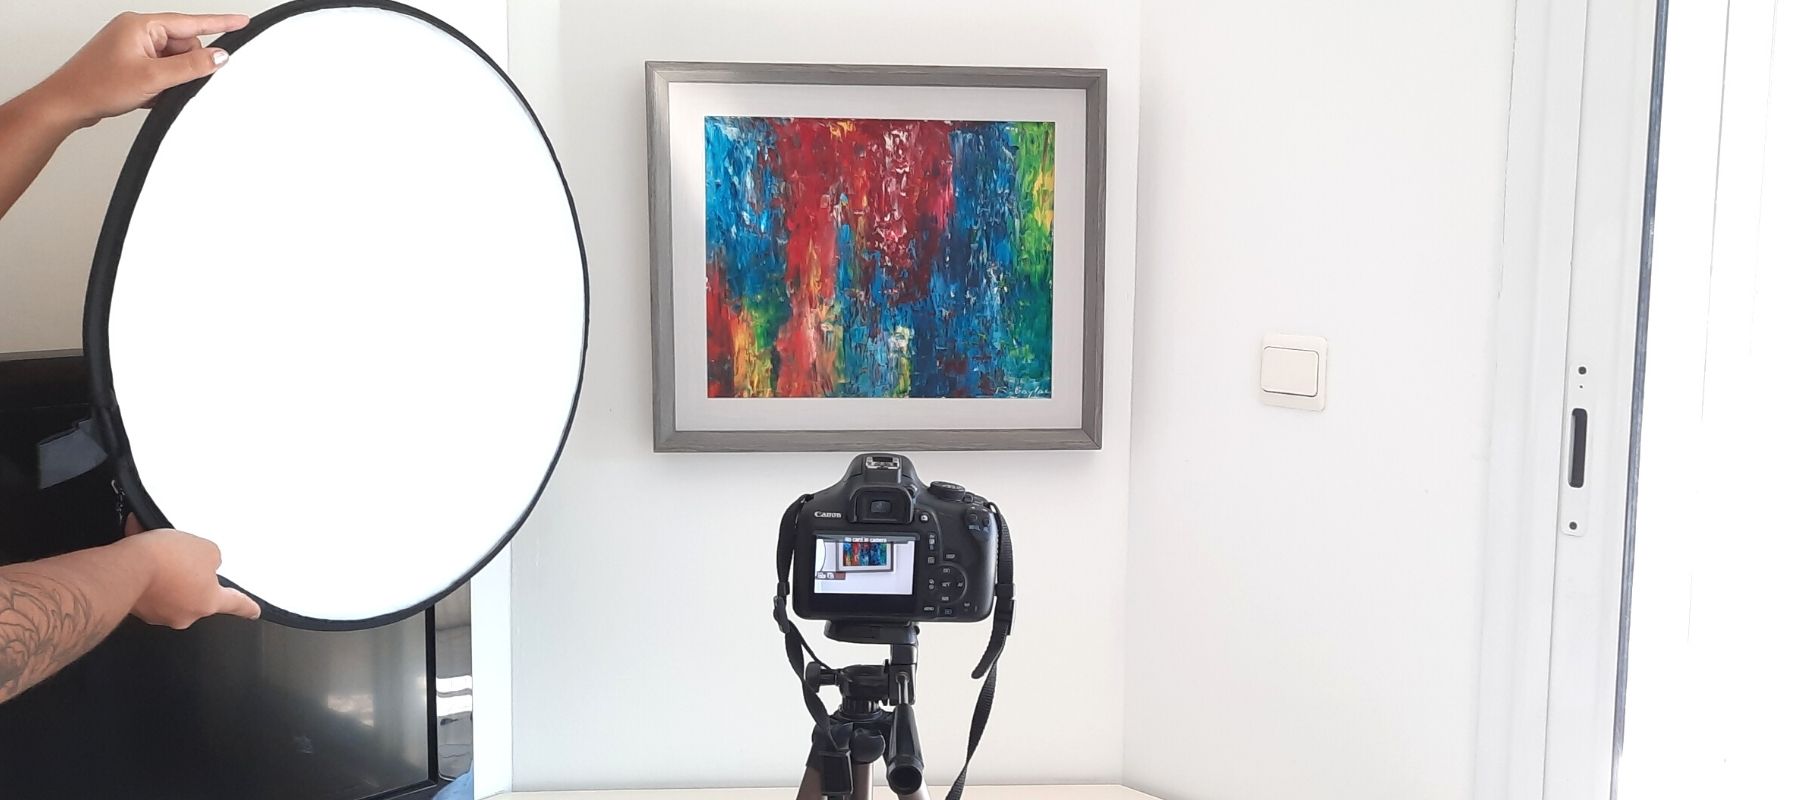
- Hang your artwork adjacent to or in front of a tall window. Tall, long windows are better than smaller ones, glass doors are ideal. A neutral white wall or background is best, as any colour or pattern can reflect onto your art and alter the perceived colours.
- Make sure the centre of the artwork is in line with the centre of the camera on its tripod, and that the art is hanging at a true 90 degrees on the wall.
- You will want to pick a time of day where the light is even, indirect yet bright. Avoid dawn and dusk when the light is likely to have a warmer colour to it.
- Turn off any artificial lights or lamps, they will create shadows and yellow light.
- Use white card or a reflector to bounce light onto your artwork in areas that are in shadow.
- Use a timer or remote control to ensure your camera doesn’t wobble as you take the photo.
Natural light can also be used for photographing sculpture and handmade items, following the same principles.
Top Tip: To create a white background that is easy to cut out digitally, drape a large piece of white paper behind your object from the wall to the surface, ensuring a seamless curve to avoid shadows.
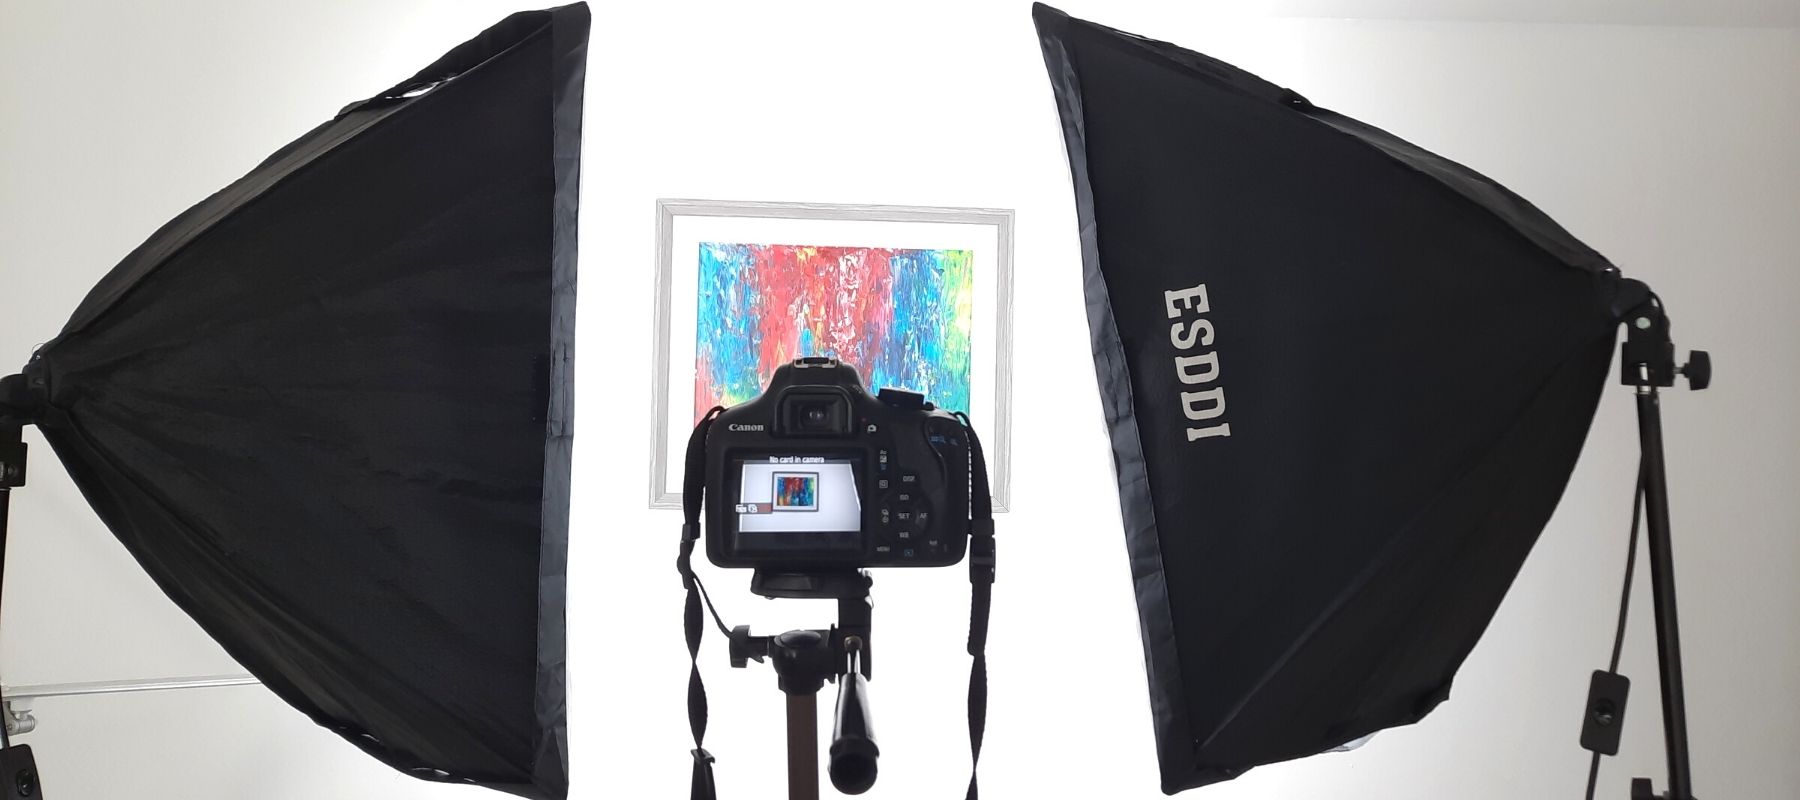
Artificial Lighting
It is more and more common for artists to own a cheap set of photography lights as part of their studio set-up. These collapsible lights fold away for easy storage, and offer a soft, diffused white light that makes taking good photographs of your artwork really easy, no matter what the lighting conditions are outside.
[eltdf_button size=”” type=”” text=”Buy on Amazon” custom_class=”” icon_pack=”font_elegant” fe_icon=”” link=”https://www.amazon.com/gp/product/B07G32T189/ref=as_li_tl?ie=UTF8&camp=1789&creative=9325&creativeASIN=B07G32T189&linkCode=as2&tag=semamartinpet-20&linkId=3da489e13fe35f6e3a5594c4d7ee763e” target=”_self” color=”” hover_color=”” background_color=”” hover_background_color=”#42495B” border_color=”” hover_border_color=”” font_size=”” font_weight=”” margin=””]
Look for a set of two lights on stands. Set them at 45-degree angles pointing at your painting, and photograph your artwork from a tripod.
If you have two standing directional lamps you can create a similar effect yourself. Sit the lamps either side of your painting and angle them at 45 degrees towards the artwork. Hang a soft white sheet or translucent plastic in front of the lamp to diffuse the light.
How do you photograph artwork without glare?
When photographing artwork, particularly oil paintings, you might find your pictures always suffer from glare – reflected light off the shiny surface of the painting. There are a number of tricks you can use to avoid glare when photographing your art.
- Play around with light sources, avoiding strong or direct light in favour of diffused lighting.
- Keep bright light sources further away from the painting, so that they provide an indirect light.
- Make sure the painting is hanging at a 90 degree angle, any tilt will make glare worse. Always keep your camera in line with the painting.
The biggest mistakes when photographing art
There are a number of common mistakes artists make when photographing their art. Each of these problems is easy to avoid with a little care and planning.
Mistake 1: Blurry photographs
Fix: Use a tripod to keep your camera steady, and set the camera to timer or remote mode to avoid shaking it as you press the shutter button. If you are still having problems, opt for a faster shutter speed.
Mistake 2: Bad Perspective
Fix: Hang your picture on a flat wall, and line the camera lens up exactly with the centre of your artwork using a tripod. Avoid having the camera too close to the artwork or you will find the image is distorted.
Mistake 3: Poor composition
Fix: If in doubt, keep things simple. Make your artwork the centre of the frame, and crop the image with an even border of background on each side. Your artwork should be the star of the show, not your ability to take a creative photograph.
Mistake 4: Poor Lighting
Fix: Buy a set of photography lights or take your photographs near an even source of indirect, natural light. Use a piece of white foam board or a reflector to bounce light back onto shadowy areas. If this still doesn’t help, adjust the aperture, shutter speed and ISO on your camera.
Mistake 5: Colour Cast
Fix: To avoid this tint of unwanted colour in your photographs, always ensure you are using a white, diffused light and that your artwork is well lit. Often colour cast is a result of using warm toned domestic light bulbs or dim lighting, which casts a shadow. When taking your picture ensure your white balance is accurately reflecting the whites and blacks of your image. This is a relatively easy fix in post production too, with most photo editors offering tools to adjust white balance and warmth.
Using a smartphone to photograph your art
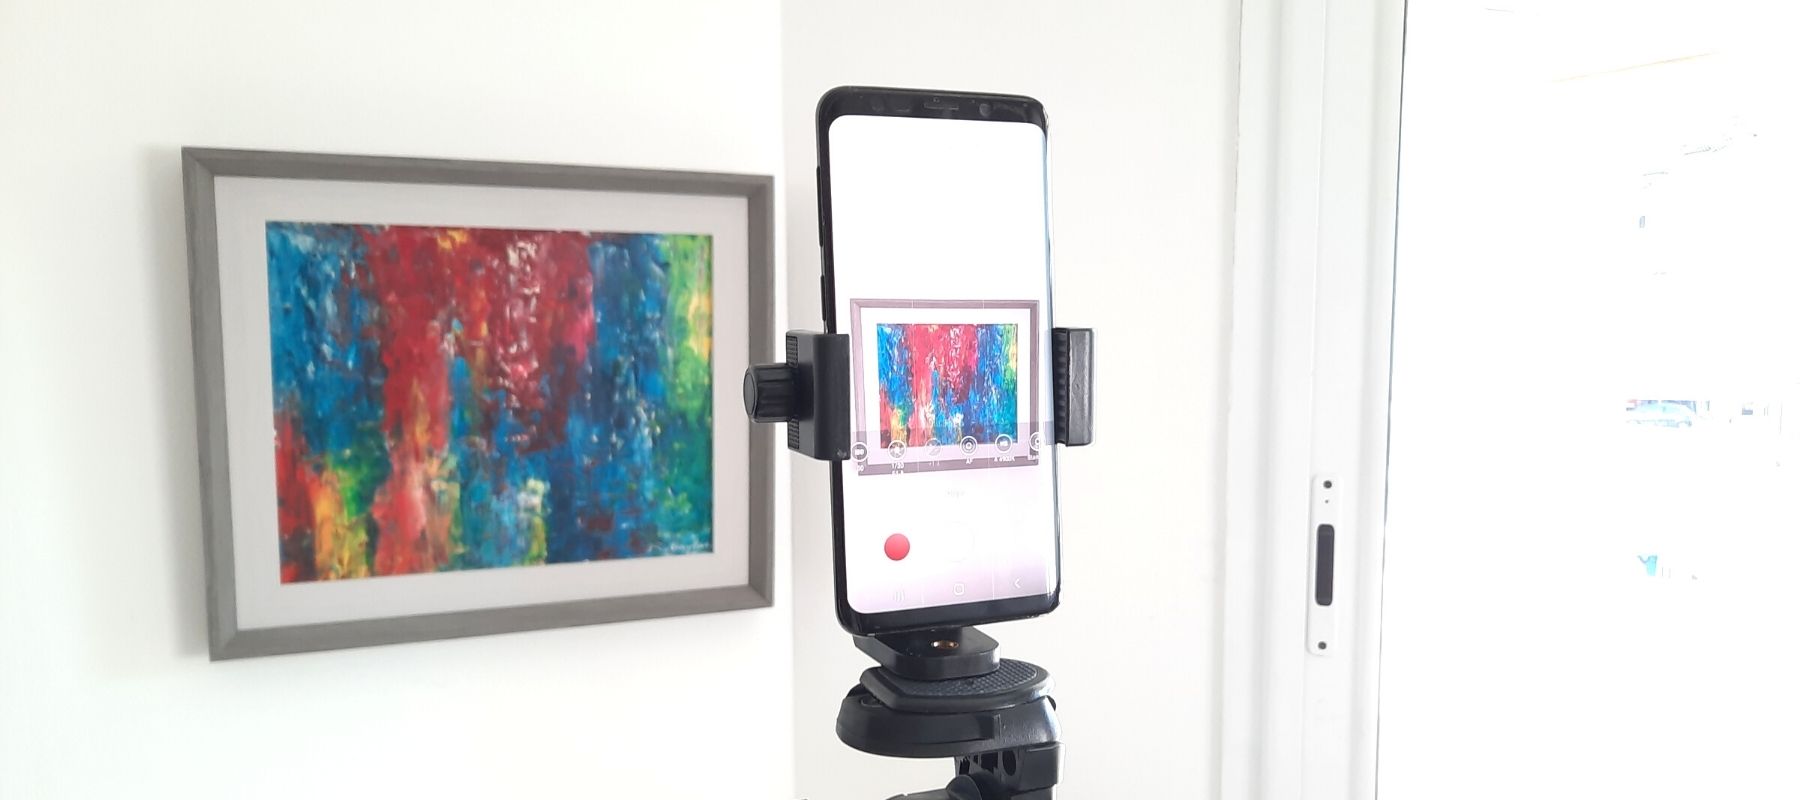
If you don’t have a digital camera to photograph your art, you can use the camera on your smartphone. It is still helpful to use a tripod and to set a timer to avoid blurriness, which may require an additional mount.
Here are some tips:
- Follow the same lighting and set up as if you were using a camera.
- Do not use digital zoom, it will lower the quality of your image.
- Clean your lens before shooting
- Use a timer or remote control
- Put on the grid display to help you frame the shot
- Don’t be too close to your artwork, this can distort the image.
- Be sure to touch the screen to focus on your subject before taking the picture.
Should you use a scanner or a camera to make prints?
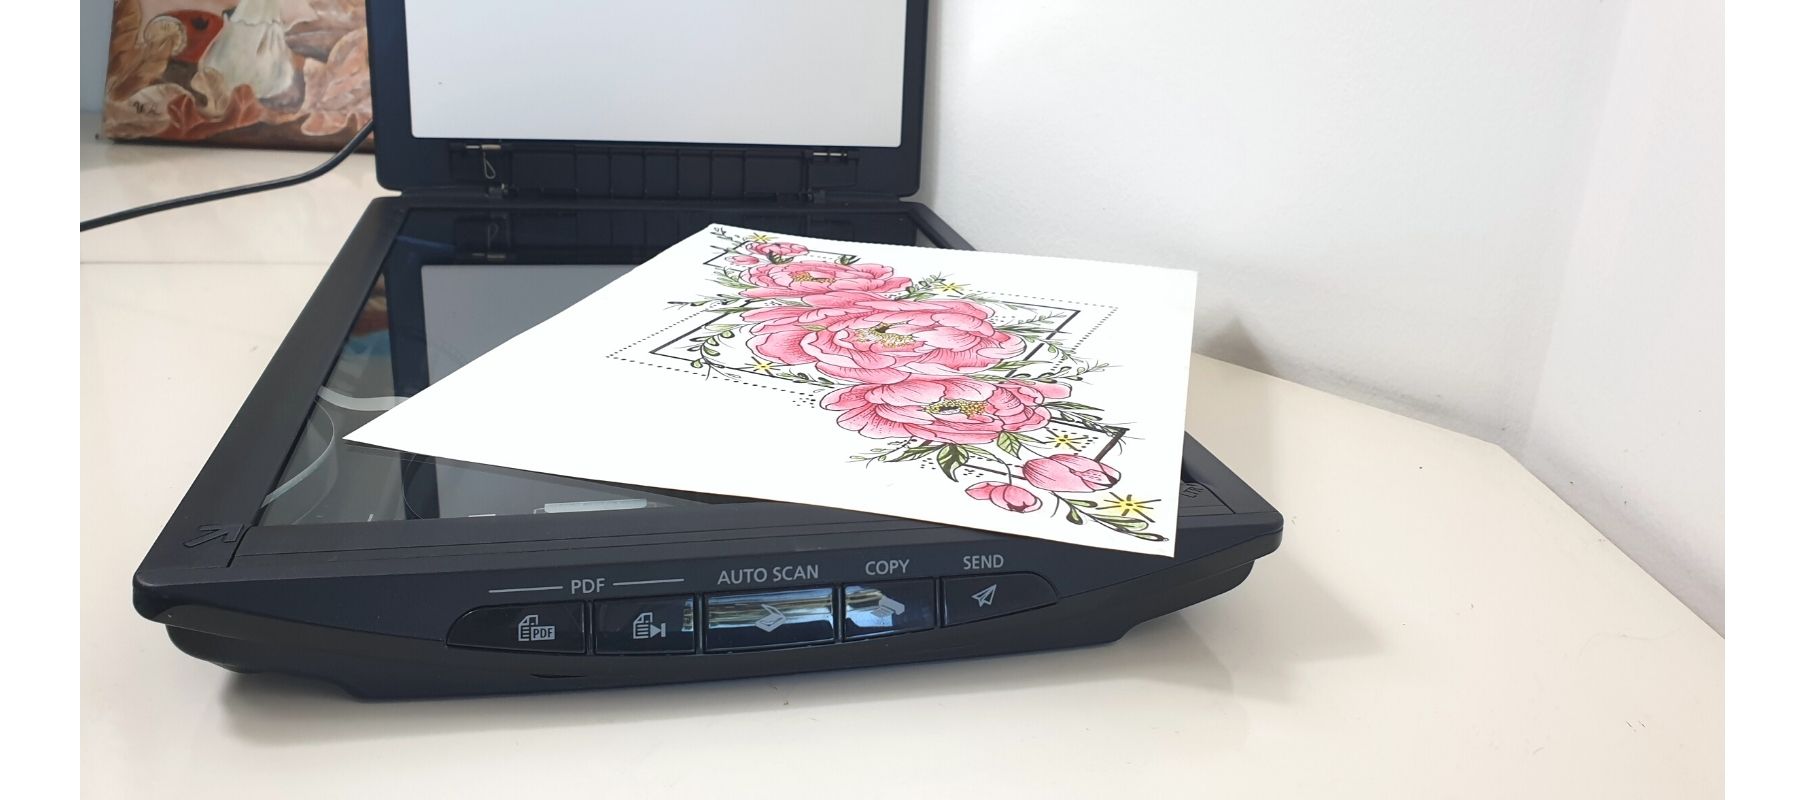
Accurately digitising your art in order to make prints is difficult and requires a level of skill in order to accurately reproduce your artwork. It can quickly become a technical minefield.
There are two basic choices, scan your work (or send it to a specialist to scan) or photograph your work with professional equipment.
If you are a serious artist looking for the best quality representation of your work, sending it to a professional is usually the best route.
Art reproduction via photography can be incredibly difficult. If you are determined to give it a go, use a high-quality camera and excellent lighting set-up. It can take some trial and error, particularly when colour matching and achieving even lighting without shadows.
Scanning can be more reliable. Scanned images are evenly lit, high resolution and predictable, not requiring advanced photography skills to get right. However, if your art is of a grand scale or involves thick textures or 3d elements, scanning is not always suitable.
The best scanners for making prints:[/vc_column_text][/vc_column][/vc_row][vc_row][vc_column width=”1/2″][vc_column_text]

Canon CanoScan Lide 300 – $69.99
[eltdf_button size=”” type=”” text=”Buy on Amazon” custom_class=”” icon_pack=”font_elegant” fe_icon=”” link=”https://www.amazon.com/gp/product/B07G5XZVLQ/ref=as_li_tl?ie=UTF8&camp=1789&creative=9325&creativeASIN=B07G5XZVLQ&linkCode=as2&tag=semamartinpet-20&linkId=c9434b09ce54eb3a2524935c42c3b6c4″ target=”_self” color=”” hover_color=”” background_color=”” hover_background_color=”#42495B” border_color=”” hover_border_color=”” font_size=”” font_weight=”” margin=””]
[/vc_column_text][/vc_column][vc_column width=”1/2″][vc_column_text]

Epson Perfection V39 Color Photo & Document Scanner – $130.99
[eltdf_button size=”” type=”” text=”Buy on Amazon” custom_class=”” icon_pack=”font_elegant” fe_icon=”” link=”https://www.amazon.com/gp/product/B00SSXQ7Q2/ref=as_li_tl?ie=UTF8&camp=1789&creative=9325&creativeASIN=B00SSXQ7Q2&linkCode=as2&tag=semamartinpet-20&linkId=feae1967351fa4e948b5a7fb636f47a0″ target=”_self” color=”” hover_color=”” background_color=”” hover_background_color=”#42495B” border_color=”” hover_border_color=”” font_size=”” font_weight=”” margin=””]
[/vc_column_text][/vc_column][vc_column][vc_column_text]
Editing your photos – what to do and what to avoid
Lots of artists, especially if you are taking pictures to post on social media, will consider digitally editing their photographs. This can be a simple way of improving your art photography, but you need to be careful not to go too far.
What you are trying to achieve by digitally editing your photographs is to make your photograph as close a representation of real-life as possible. For example, if your pictures came out slightly underexposed and dark, this can be rectified to some degree using digital editing. However, if you start making changes that don’t represent your art accurately, you might be misleading viewers, which is disingenuous.
If you don’t have access to digital photo editing software, try Pixlr.com, a free web-based photo editor, or the mobile app InShot which allows you to edit photos and video from your phone.
Good photo editing examples:
- Crop and rotate your image to ensure the most effective framing and composition.
- Adjusting the brightness and contrast levels.
- Adjusting the saturation to better reflect colours accurately.
- Adjust the temperature of an image.
Poor editing examples
- Digitally manipulating the image or adding features.
- Airbrushing or altering textures or finishes digitally.
- Overusing tools like saturation or contrast.
- Applying misleading filters or pre-set effects.
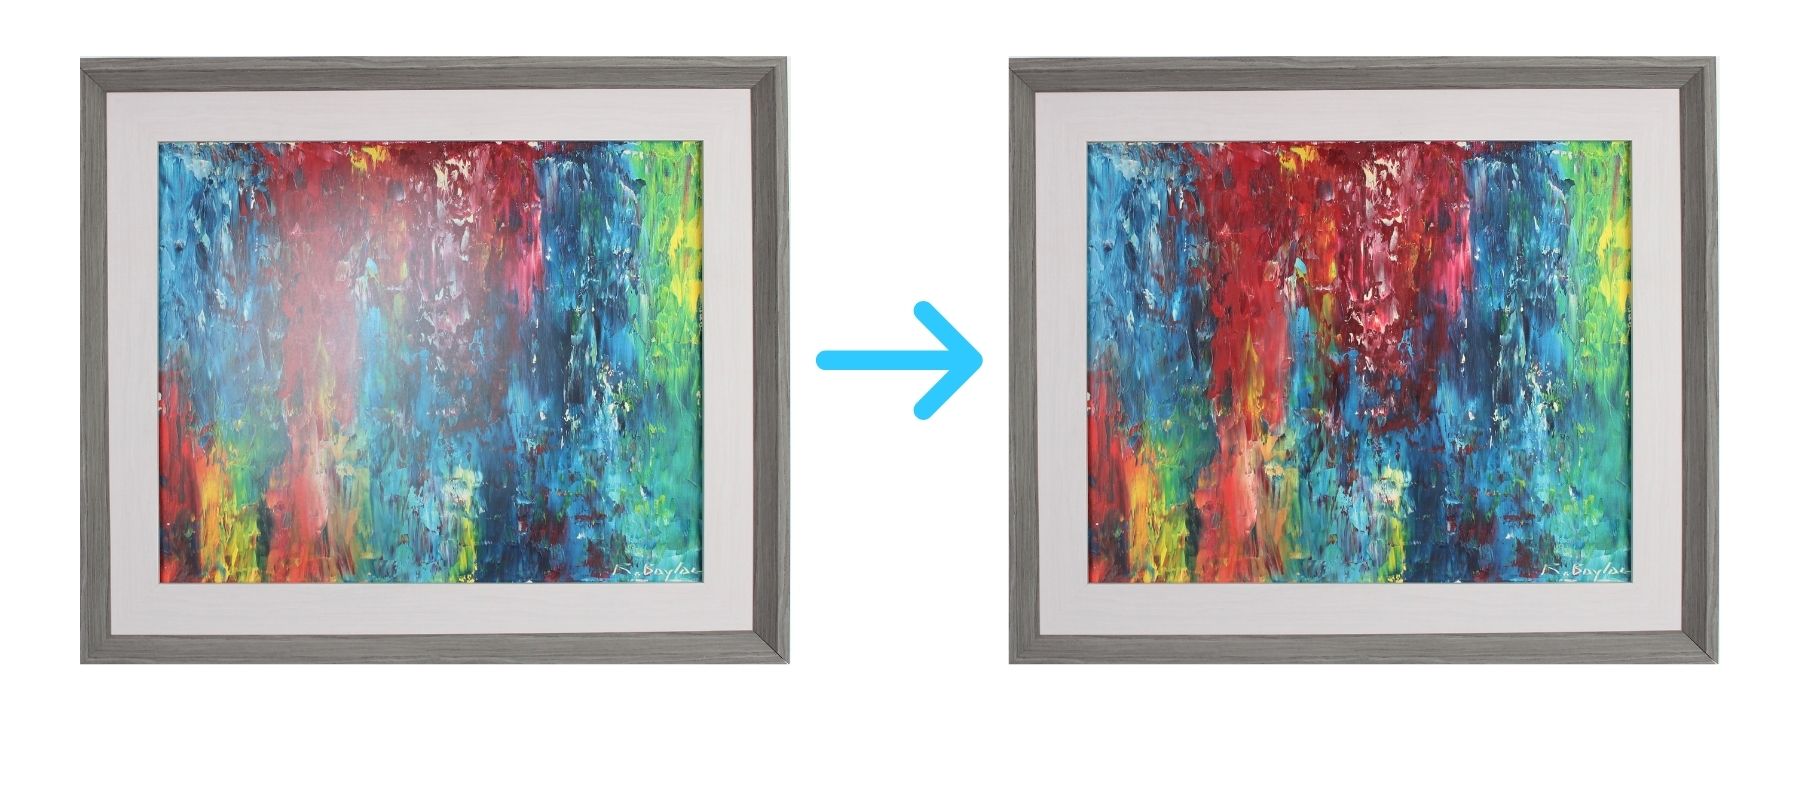
For example, look at this photograph of a colour pencil drawing, taken using an Android smart phone.
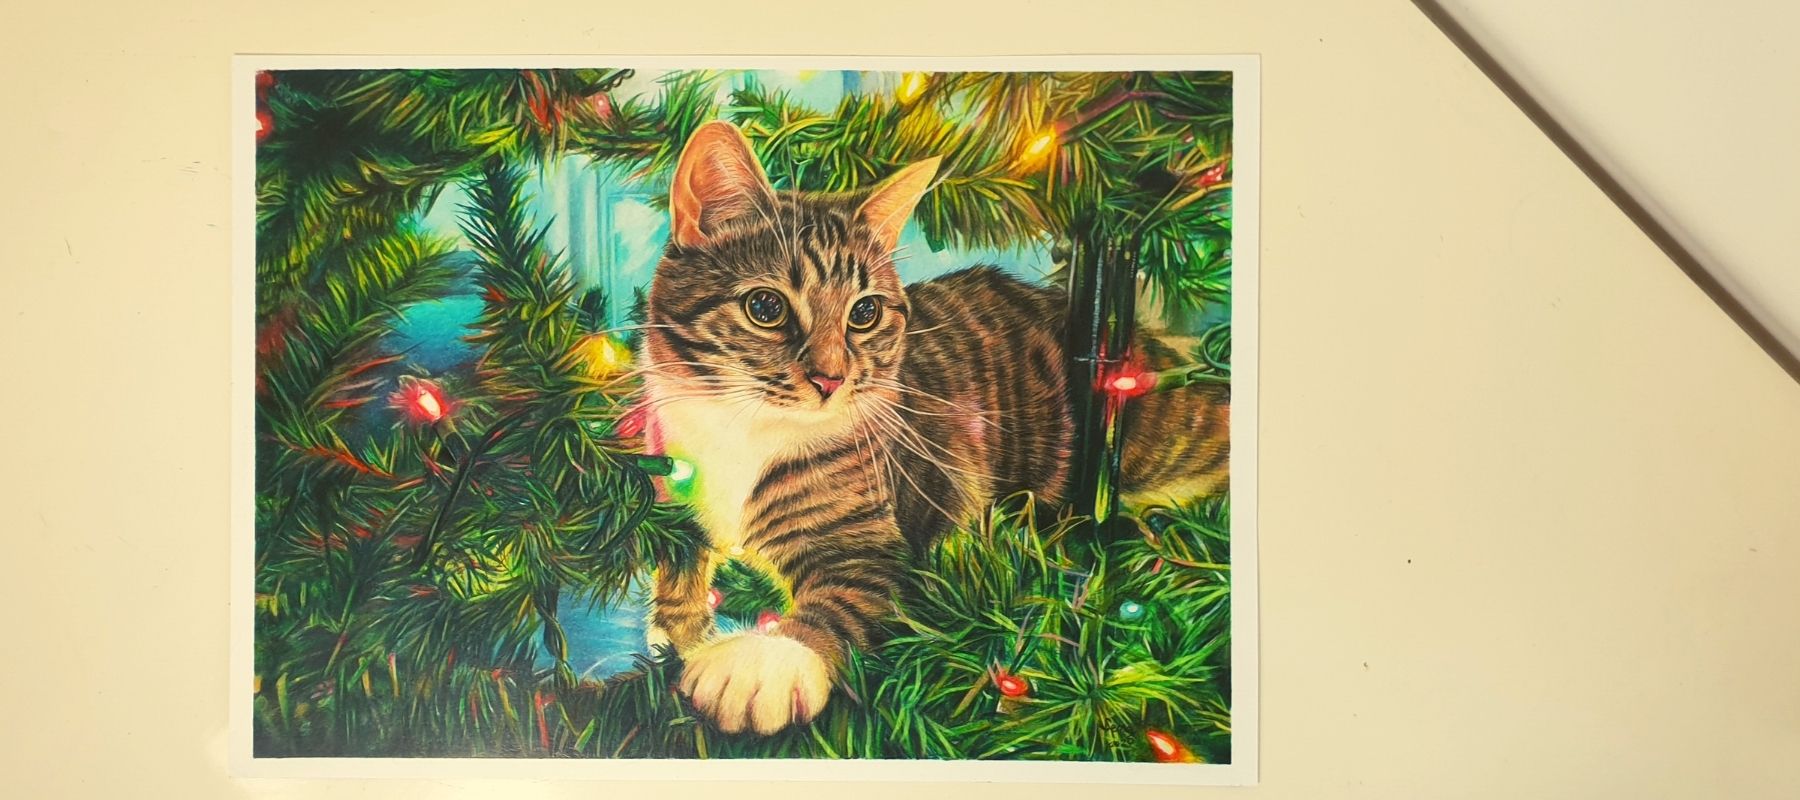
We are going to digitally edit the image for use on social media.
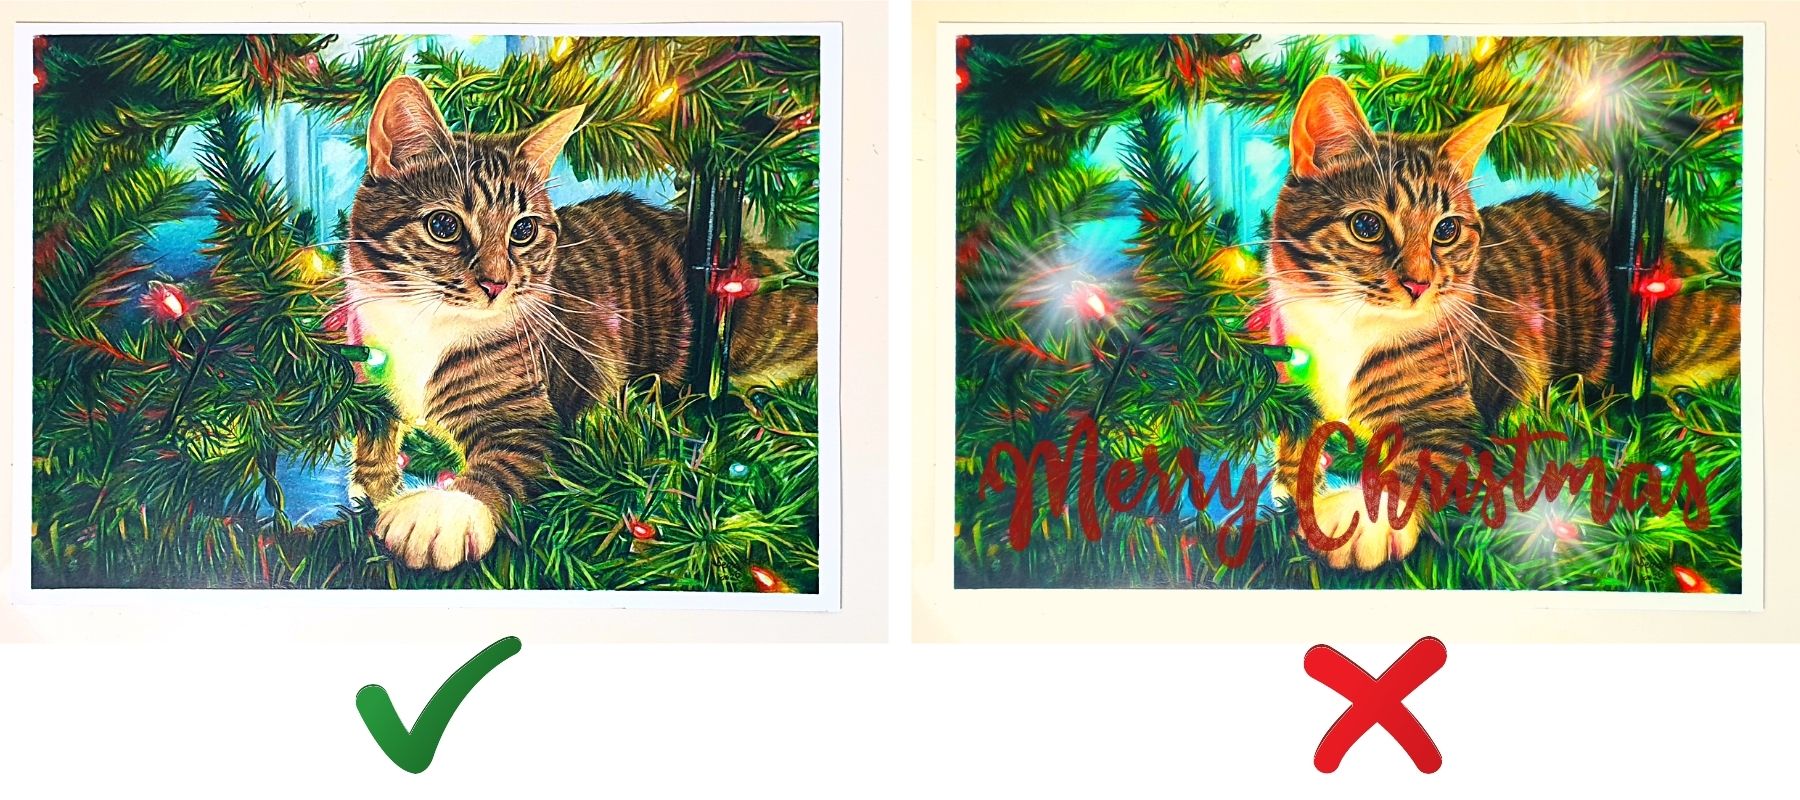
On the left you can see an example of good editing. The following changes were made to accomplish this:
- Crop – to tighten up the framing of the shot and highlight the drawing.
- Increase Brightness – Remove the gloominess by increasing brightness.
- Decrease Temperature – Reduce the temperature to remove the ‘yellowness’ of the lighting.
On the right is an example of bad editing. The following points are reasons why this is bad:
- Oversaturated – the colours no longer reflect how they really look.
- Airbrushing – the image has been digitally enhanced in places.
- Excessive contrast – the lighting is no longer realistic, shadows are too dark.
- Frame – the digital frame used is distracting from the artwork.
Photographing your art can involve a bit of trial and error, using the equipment you have in creative ways to achieve the desired result. Whatever set-up you are working with, always remember to keep your photos well aligned and well lit!
I hope you enjoyed this article and it gave you a better insight into photographing your art. If you have any questions about this topic feel free to contact us anytime.
Affiliate links have been used in this article
[/vc_column_text][vc_empty_space height=”50px”][eltdf_social_share icon_type=”font-elegant”][/vc_column][/vc_row][vc_row][vc_column][vc_separator align=”align_left” border_width=”5″][vc_column_text]
Read more…
[/vc_column_text][vc_empty_space height=”20″][vc_basic_grid post_type=”page” max_items=”100″ style=”load-more” items_per_page=”3″ item=”10597″ btn_style=”modern” btn_color=”default” btn_size=”sm” grid_id=”vc_gid:1689463194031-7b0c06d1-3d7a-8″ taxonomies=”145″][/vc_column][/vc_row]